
Nightstand Size: How to Measure Bedside Space
Measure mattress-top height, bedside space, storage access and cable clearance, then turn the results into a clear nightstand size brief.
Choose a nightstand by measuring the floor-to-mattress-top height and the usable space beside the actual bed, then checking the table’s overall dimensions, opening clearance and cable space. A bed’s size name alone cannot tell you which nightstand will fit.
This method works for an individual room or a bedroom range brief. Once you have the measurements, use our nightstand range and sourcing page to compare storage formats and select a starting model.
1. Measure the mattress top, not just the bed frame
With the bed assembled in its intended position, measure vertically from the floor to the top of the mattress at the bedside. Include the topper if it will remain in use; move loose bedding aside. Record the bed-frame height separately, with its measurement point labelled. A frame dimension or mattress thickness on its own does not give the finished sleeping-surface height.
Next, record your preferred tabletop position relative to that mattress top. Try reaching for a phone, lamp switch or glass from the intended lying or sitting position, using a temporary surface if helpful. This is a preference check for that user and layout, not an ergonomic certification. Ask the supplier to confirm the height of the usable tabletop if a raised edge or other part extends above it.
What about a bedside table standard size?
Treat a search for “bedside table standard size” as a starting question, not a fit specification. A listed size describes a particular product and configuration. It does not establish a universal width, depth or height for every mattress, user or room. Define the measurement points and your required relationship to the bed before choosing a size.
2. Map the space beside each side of the bed
Measure from the outermost bed-frame edge to the nearest wall, wardrobe or other fixed obstruction. Do this separately on the left and right. Include a projecting headboard, skirting board, radiator or curtain where it affects placement; the mattress edge may not be the widest part of the bed.
Record the available depth and mark where the nightstand’s front would sit. Use removable tape to outline a candidate’s overall width and depth on the floor. Check access to the bed, nearby doors and the route through the room. Any gap reserved for walking, bedding or cleaning is a separate layout requirement, not space automatically available for a larger table.
Nightstand size for a king bed
“King” does not specify the installed bed-frame footprint, mattress-top height or remaining floor area. Measure the actual bed, including projecting rails and headboard, and place it on the room plan. Check each bedside area after allowing for the intended route around the bed. Use those results to select the nightstands; do not derive their width from the bed name or divide the room’s leftover width equally without checking the layout.
3. Separate the product dimensions
Ask for a drawing that names the axes: width across the front, depth front to back, and height from the floor. Keep these four measurements distinct.
| Measurement | What to confirm |
|---|---|
| Overall width × depth × height | The complete assembled product in its stated position. Confirm whether handles, feet and other projections are included. |
| Tabletop | The actual top outline and usable surface, plus its height from the floor. Overall width and depth do not prove tabletop dimensions. |
| Base footprint | The outer limits of the feet or base at floor level. A smaller base does not make a wider top fit between obstructions. |
| Moving parts and projections | The closed handle projection and the space occupied by an open drawer or door. Record internal usable storage dimensions separately. |
4. Check opening and plug space
Draw the full drawer opening path or door swing on the plan. Check it against the bed frame, bedding, nearby furniture and the space needed to use the storage. The product’s closed depth does not tell you its drawer travel. Ask for that travel and the internal drawer or cubby dimensions when they matter to the intended contents.
Locate the wall outlet and check it with the intended plug or adaptor inserted. Allow for the connector body, cable routing and access to disconnect it, following the electrical component’s instructions. A table pushed against the wall may occupy a different position once a plug and cable are behind it. For integrated charging, confirm the selected electrical version and destination-market requirements separately from furniture fit.
Two nightstands, two different space checks
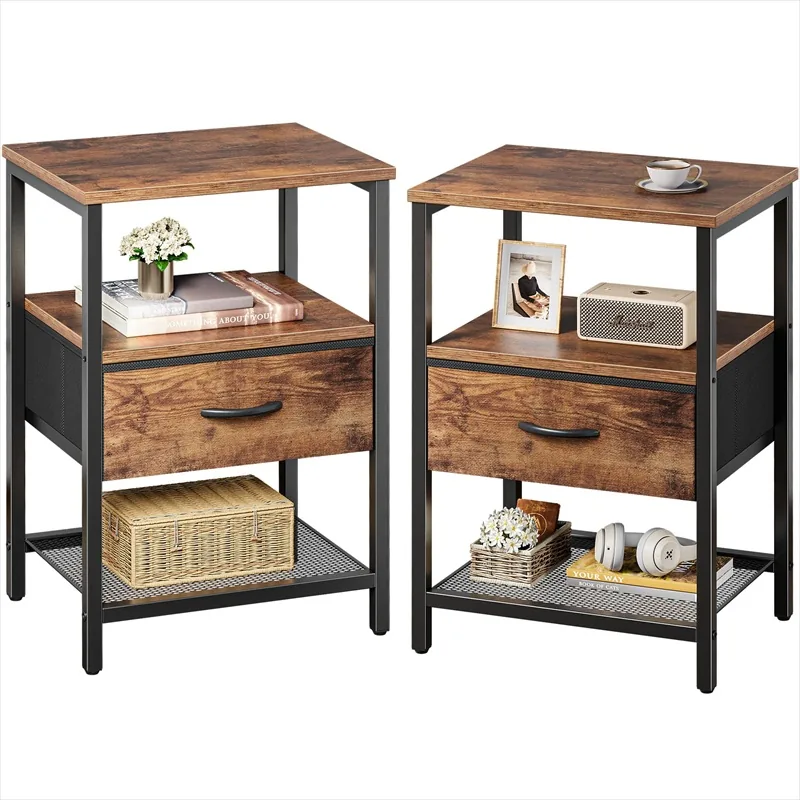
These examples use the current catalogue versions and recorded overall dimensions, checked on 31 October 2026. Dimensions refer to one assembled nightstand, although each photo shows two. The images identify the products; no dimensions have been estimated from their proportions. Confirm the drawing and sample for the version being ordered.
Demonstration scenario only: suppose one bedside area measures 65 cm wide and 45 cm deep, and the floor-to-mattress-top height is 65 cm. These are invented inputs for showing the calculation, not a measured room or a recommended clearance standard.
Fabric-drawer nightstand with mesh shelf — HOM-ST-238R
The recorded overall size is 40 cm W × 30 cm D × 60.5 cm H. In the demonstration area, subtracting the listed width leaves 25 cm across the bay; subtracting the depth leaves 15 cm along its depth. Those totals still need to accommodate the chosen side gaps, rear allowance and front position. They do not establish a usable walkway.
If the drawing confirms that the main tabletop is the highest point, it would sit 4.5 cm below the demonstration mattress top. Check that relationship with the intended user. This format combines a fabric drawer, open cubby and mesh shelf: confirm drawer pull-out space and usable cubby or shelf openings rather than treating the overall size as storage capacity.
View the fabric-drawer nightstand specifications.
Fluted three-drawer charging nightstand — HOM-ET-23BR

The recorded overall size is 58.4 cm W × 39.1 cm D × 61.7 cm H. In the same demonstration area, the remaining totals are only 6.6 cm across the bay and 5.9 cm along its depth, before distributing any side or rear allowances. A positive subtraction alone does not confirm fit, especially where a wall plug or projecting handle changes placement.
If the drawing confirms that the main tabletop is the highest point, it would sit 3.3 cm below the demonstration mattress top. This model is close in overall height to the fabric-drawer example, but occupies more width and depth. Its three drawers and charging feature make drawer travel, handle projection and the selected cable route key checks. Internal drawer dimensions and opening travel remain to be confirmed; the overall dimensions do not supply them.
View the fluted charging nightstand specifications.
Measurements to Include in Your Enquiry
Copy this checklist into your enquiry and add your own measurements. Use one unit throughout and attach a simple plan or labelled photos. Distinguish your requirements from confirmed product dimensions, and leave unresolved details for the supplier to verify.
- Bed and mattress: Give the actual bed-frame width and length and the floor-to-mattress-top height, including any topper used. Label the reference points for any separate frame-height measurement.
- Available space: Give the usable width and depth on each side of the bed. Mark obstructions, the intended passage and outlet positions, including the projection of the plug in use.
- Nightstand requirements: State your maximum overall width, depth and height, the usable tabletop area you need and your preferred tabletop position relative to the mattress. Include any base-footprint limit.
- Storage and access: Describe what you need to store and the openings required. Identify drawer or door access constraints, handle projections and cable space that need checking.
- Model and version: Name the starting model, finish and any requested changes. For integrated charging, specify the destination market and the electrical version to be reviewed.
- Supplier confirmation: Ask for a version-labelled drawing showing overall dimensions, tabletop height and outline, base footprint, projections, opening travel and usable clearances. Agree which unresolved dimensions and version details require sample confirmation.
For a range-development project, transfer this brief into the furniture product specification sheet so the dimensional requirements stay attached to the selected version and sample review. Return to the nightstand range when you are ready to compare formats.